![]()
Choosing the size of the motor at this stage can provide an
indication of how strong to build the rocket. It is important to
remember to build strong but light rockets. Replace the Elmer's with
epoxy resin, replace the xacto with a Dremel, use quality paints and
primers, and do not skimp on the shockcord. If the kit comes with a
stretchy shockcord, make a sling shot out of it and give it to your
kids. I failed my first level 1 attempt due to these stretchy underwear
waistband shockcords.
Rocket speeds can range from a couple hundred miles an hour to in
excess of Mach 2. Build the rocket appropriately with these speeds in
mind. Most rocket kits are fine if the instructions are followed and
the rocket constructed well. However, if you wish to push the envelope,
plan now. Remember, everyone wants to go higher and faster after a few
successful flights under their belt.
I tend to build my rockets strong. Extra fillets along the fins and
epoxy fillets around the engine bulkheads. With Sweet
Vengeance, I applied a layer
of KEVLAR ® cloth followed by a layer of fiberglass over the body tube.
I vacuum packed fiberglass over the aircraft quality birch fins, and
epoxy fiber glassed all bulk heads. I applied a layer of fiberglass
tape above the shoulder of the nose cone to provide extra thickness and
faired everything using epoxy and micro balloons. I did this because I
knew that one day I will fly Sweet Vengeance on a 76mm M class engine .
. ., maybe.
If given the option, choose rail buttons over launch lugs. Rail
buttons are cheap and easily available. Rail buttons allow the use
of a stiff launch rail that will keep the rocket straight and true
during the critical liftoff phase. Launch lugs require rods that tend
to sway in the slightest of breezes.
Common rocket materials are epoxy resins, aircraft quality plywood,
fiberglass cloth of various weights, carbon fiber, aluminum, expanding
foam, and plastic. Combine these with sensible construction skills and
patience and your rocket will be well on its way for its first flight.
Just because certain materials are not in your rocket kit, does not
mean that it cannot be substituted or upgraded. The materials used in
your rocket depend on you and your flight aspirations. If in doubt,
build strong and fly high.
To finish or not to finish, that is the question of the day. After all
the construction, take the extra time to sand, prime, sand, prime, sand
and paint. A rocket with nice round edges and smooth surfaces will
perform much better. Also, it will attract the attention of the lovely
rocket groupies that frequent the launches.
Now we need for select our engine.
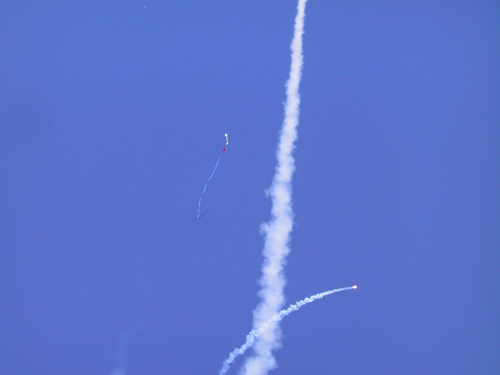
Too much motor for the rocket causing a shred and leading to a really spectacular flight. Not good!
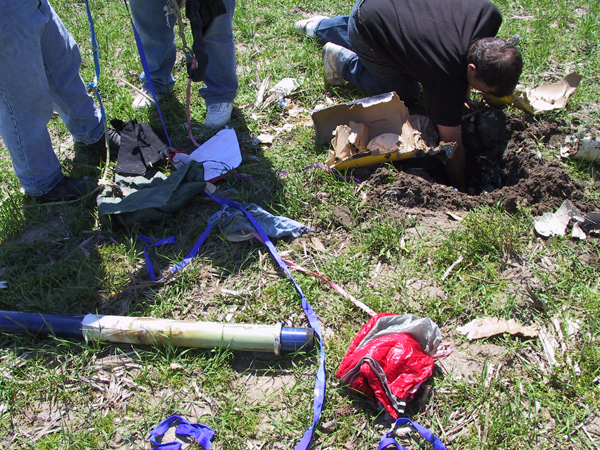
Electronics failure due to motor nozzle failure allowed the rocket to ascend fast and descend even faster. You should never have to recovery your rocket with a shovel. Not good!