Oktoberfest is over. The leftover German food
is gone and the German beer is dwindling. The Mars Lander
project is once again taken off the shelf, dusted off, and moved
to the family coffee table (slash workbench).
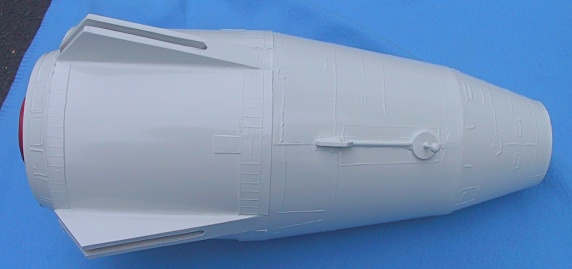
The entire body tube was slightly sanded and given two coats of
Krylon gloss white. The gloss white really highlighted the
imperfections even more. Once again, the entire body was touched
up with putty, sanded, and repainted a couple of more times.
What I thought was a decent raised detail with the fabric paint
did not look as good once the white gloss highlighted every
imperfection. More time should have been taken for the raised
detail. The Mars Lander was given the final two coats of gloss
white. Once the paint dried, the Mars Lander was taken outside
into the sunlight and scrutinized from ten feet. It passed the
10-foot test.
The decals were studied and each decal location was found on the
Mars Lander body. The water slide decals were individually cut
and applied. Pappa Tango are known for their quality decals and
the decal application occurred without any problems. In fact,
the decal application was quite enjoyable. The decals were
allowed to dry for a couple of days.
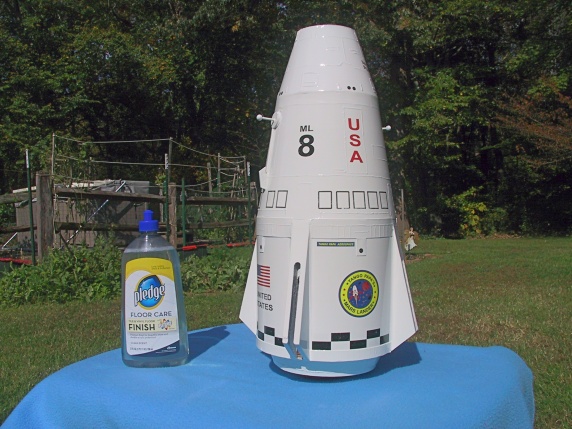
I decided to try Future Shine as a protective clear coat. I used
Pledge Floor Care Tile and
Vinyl Floor Finish with Future Shine. The key is the
Future Shine. A foam brush was used to apply the Future Shine.
The Future Shine applied well and provided a hard clear coat of
acrylic protection. It also had a nice clean scent so it was no
problem using it indoors. The wife even throught I did some
cleaning, little did she know. The Mars Lander with its clear
coat was once again allowed to dry.
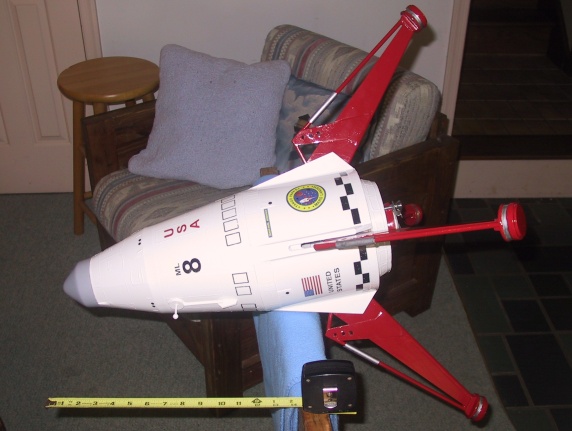
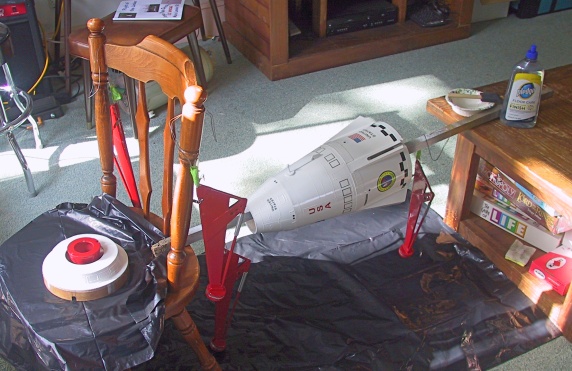
The legs were attached and the recovery gear was packed. The
Mars Lander weighed in at 4 lbs, 8 ozs. The initial center of
gravity was checked and was 15 inches aft of the nose cone tip
without a loaded engine. The Mars Lander will require some nose
weight to maintain the center of gravity with a loaded engine.
A Loki H144 was loaded into the Mars Lander. A plastic cup was
duct taped to the nose cone and the Mars Lander was once again
balanced while water was added to the cup. Water was slowly
added until Mars Lander balanced at 15 inches with the loaded
H144 engine. The water was then weighed and came to 10 ounces.
This technique was suggested by Tom, the maker of the Mars
Lander 2X kit.
I went back to Rocksim armed with this initial knowledge. A
Rocksim file for a Mars Lander 1.5X was found and was scaled up
to 2X. Various tweaks were made until the Mars Lander was
virtually constructed within the simulation software. I was
disappointed as my Mars Lander weighed in at 19 ounces more than
Rocksim’s calculation. I reminisced over the construction and
realized that the weight difference must have been a scaling
issue as there were not many opportunities to shave that much
weight from the project. A mass object of 19 ounces was added to
Rocksim to make the weight match. This also allowed the mass
object to be positioned within Rocksim so the center of gravity
that was previously measured matched with Rocksim.
A virtual Loki H144 was loaded into the virtual Mars Lander and
the nose weight was virtually added. Rocksim confirmed that 8 -
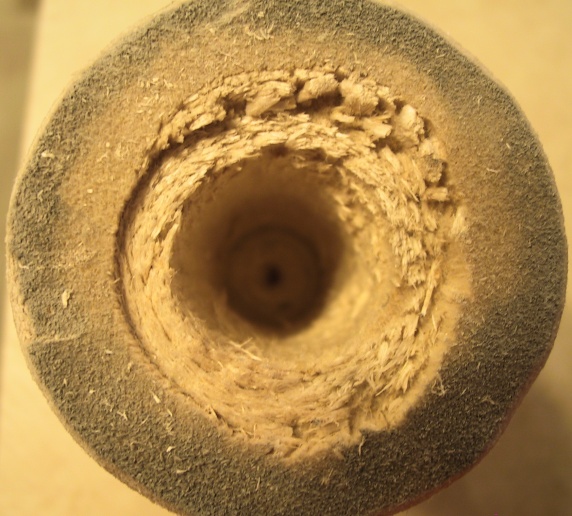
12 ounces of nose weight would be adequate. The balsa nose cone
was carefully drilled to make room for 10 ounces of lead. The
nose cone was drilled deep to get as much weight forward as
possible. The balsa wanted to shred so drilling was more
difficult than anticipated. However, with persistence, a hole
was drilled almost all the way to the tip of the nose.
October ends with kids knocking at the door asking for candy. I
hope we do not get many trick or treaters this year as that
means more leftover candy for me. Steps 44, 45, and 47 have been
completed. Only the Mars Lander nose cone steps 41 and 46
remain.
By Peter E. Abresch Jr.